ProjectSight's Ball-in-Court Workflow Example: RFIs
Leveraging ball-in-court workflows in ProjectSight to streamline your RFIs.
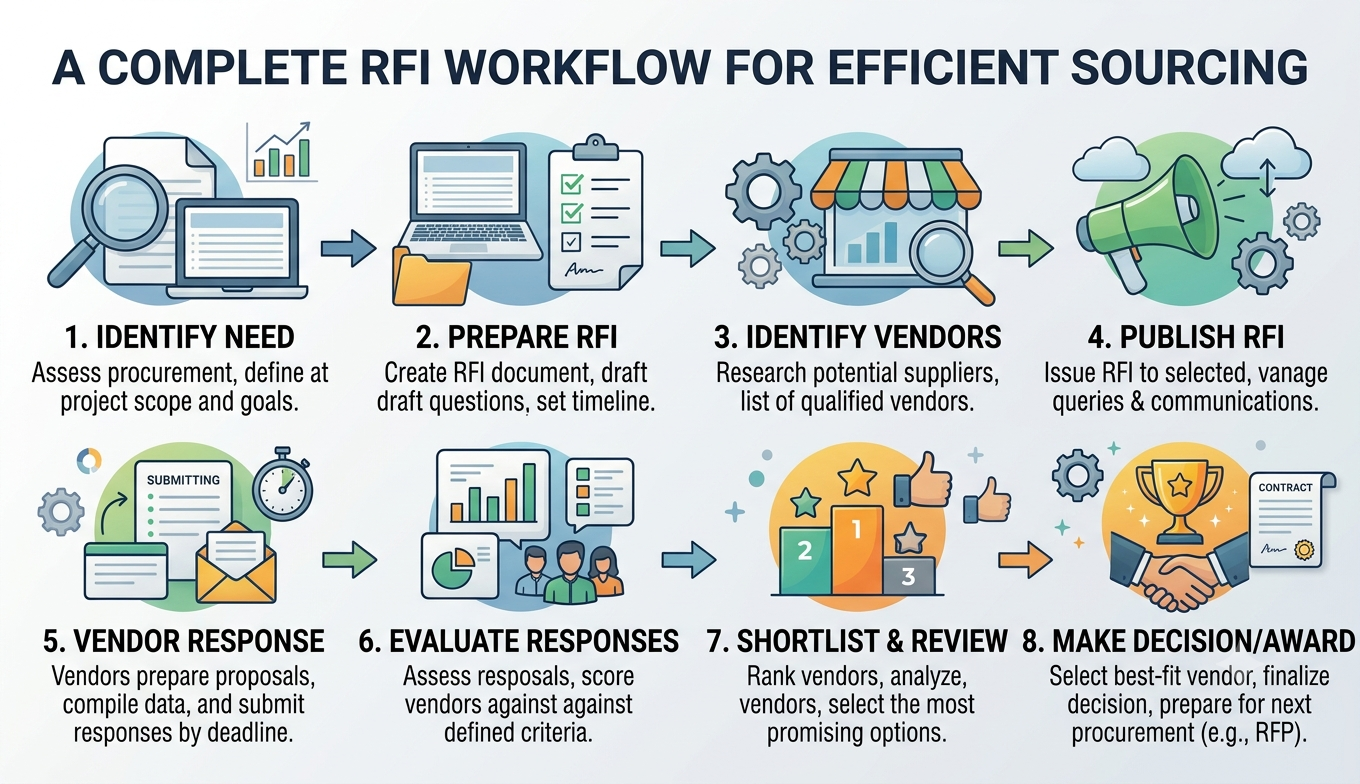

We discussed ProjectSight’s new feature – “ball-in-court workflows” – in December, a few weeks after the product arrived to users. In this blog post today, we will dive deeper into workflows and how users can properly configure them for real world scenarios, specifically for Requests-for-Information (RFIs).
To begin creating a workflow for my RFIs, I will first need to enter my settings portal. You can build workflows in either portfolio or project settings, but I would recommend building them in project settings since each project can be unique in its required steps and personnel. In our project settings, we will navigate to Records>RFIs>Workflows. Like I discussed in the previous blog post, there will be a black bar at the top of your screen asking if you would like to “Upgrade now.” It is no additional cost but is a requirement to shift from regular workflows to ball-in-court workflows.
Once you select “Upgrade now” and create a new workflow, you will see a screen like the one below. I have already created an example workflow and will post screenshots of each step with detailed instructions on how to properly configure the step properties.
Draft:
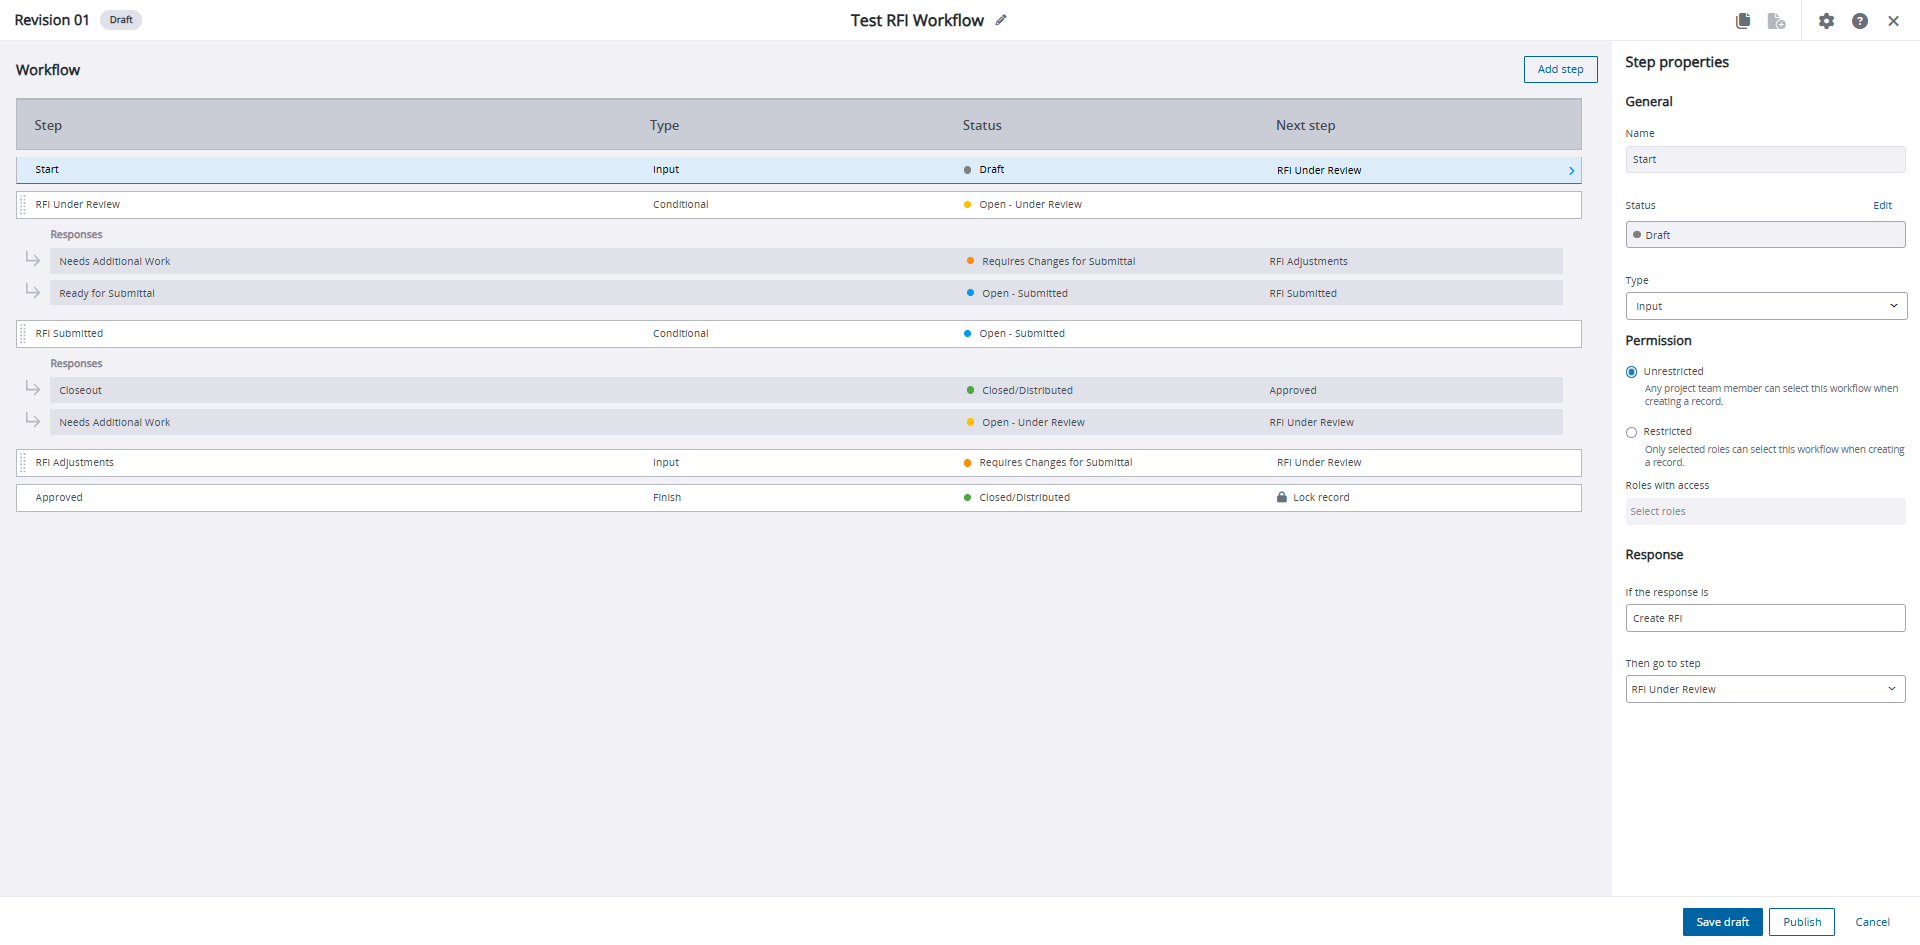
Every workflow will begin with this “draft” status. There are minimal properties to tweak since it is a required status. For your type, make sure to select “Input” for records that simply need to progress from one status to the other or “Conditional” for records that require a binary response like “Approved” or “Unapproved”.
The “Permission” structure dictates who is going to be able to create a record with this workflow. Since we want anyone with the proper permissions to generate an RFI, we will leave out any permission restrictions. Upon creation, we want our record to advance to “Open – Under Review” so we will select that as our next step in the “Response” section.
Open – Under Review:
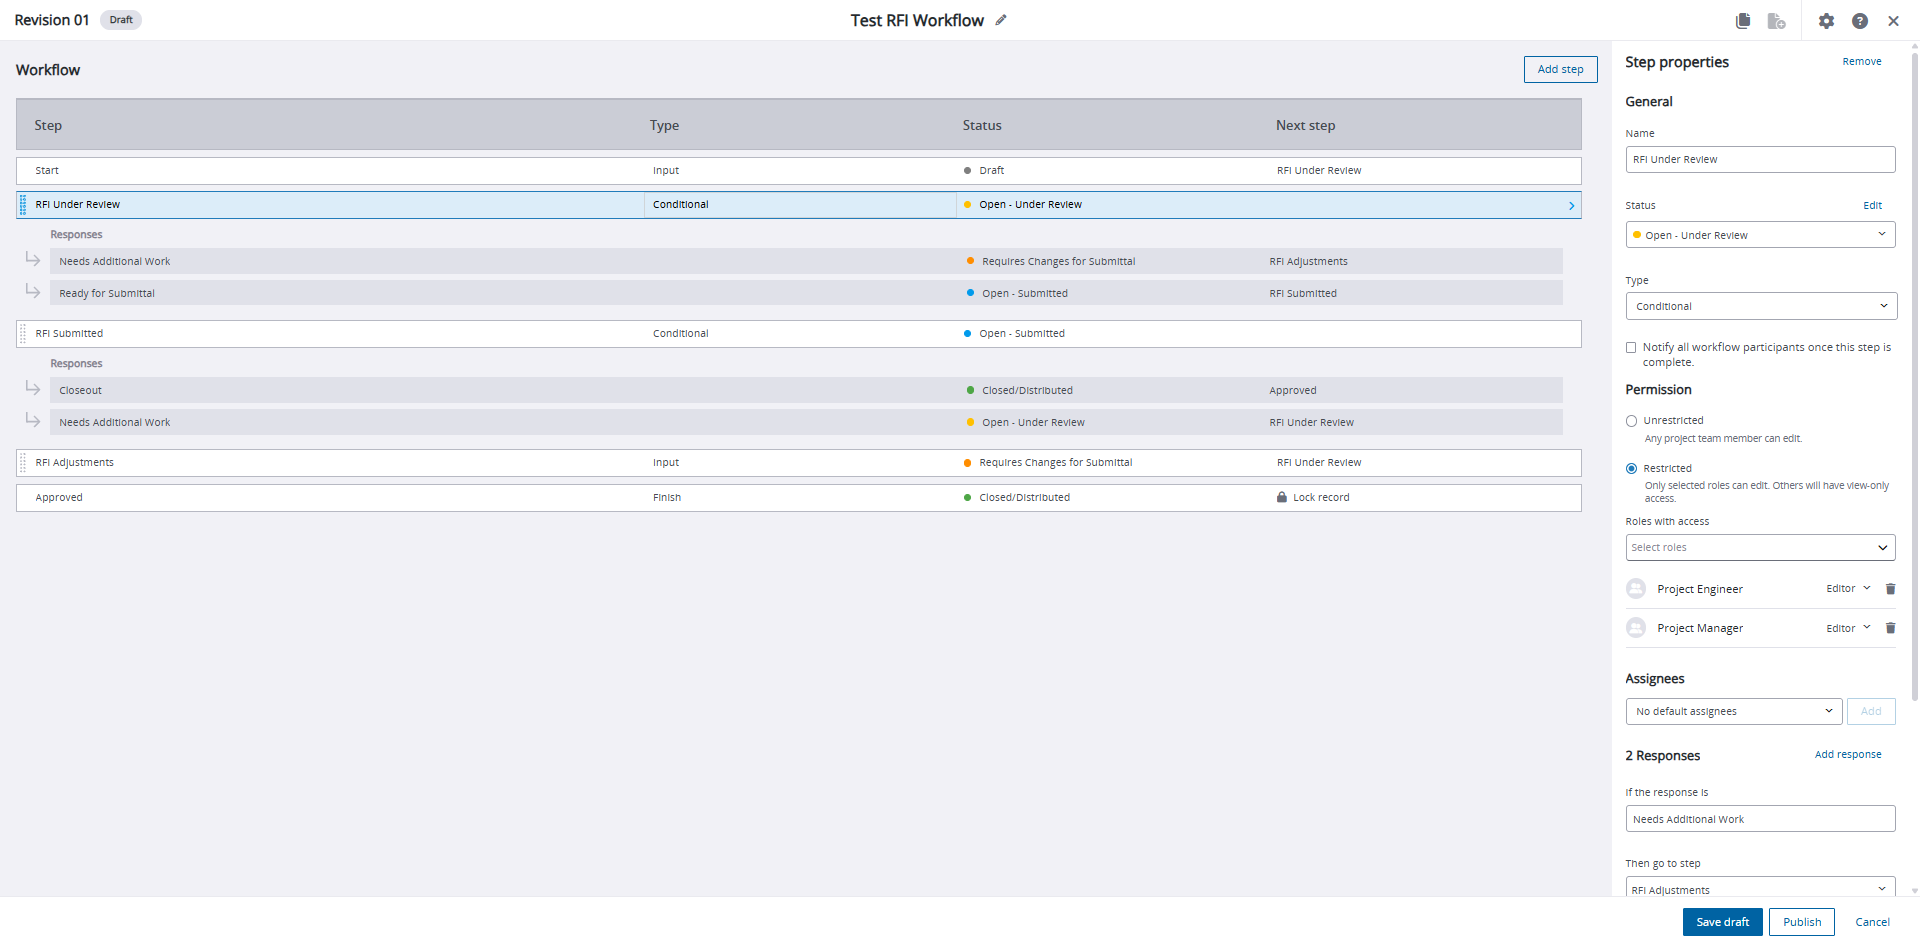
When an RFI reaches this status, we want the PM or PE to vet the RFI for accuracy and contract alignment. Since we only want one of those two security roles to push the RFI through this stage, we can assign those roles to this stage. That way, they are the only users – besides Portfolio Administrators – who can push this record along to the Submittal stage.
We can also add users to the Default Assignees list if we need any singular person to always be attached to a record when it hits this stage. Finally, we build in our two possible “Conditional” responses, one for sending the RFI to the next step and the other for bouncing it backwards to the RFI Adjustments stage. There is also an option to add the number of days the step should take to complete and the record’s due date will become the sum of all days in each row.
Open – Submitted:
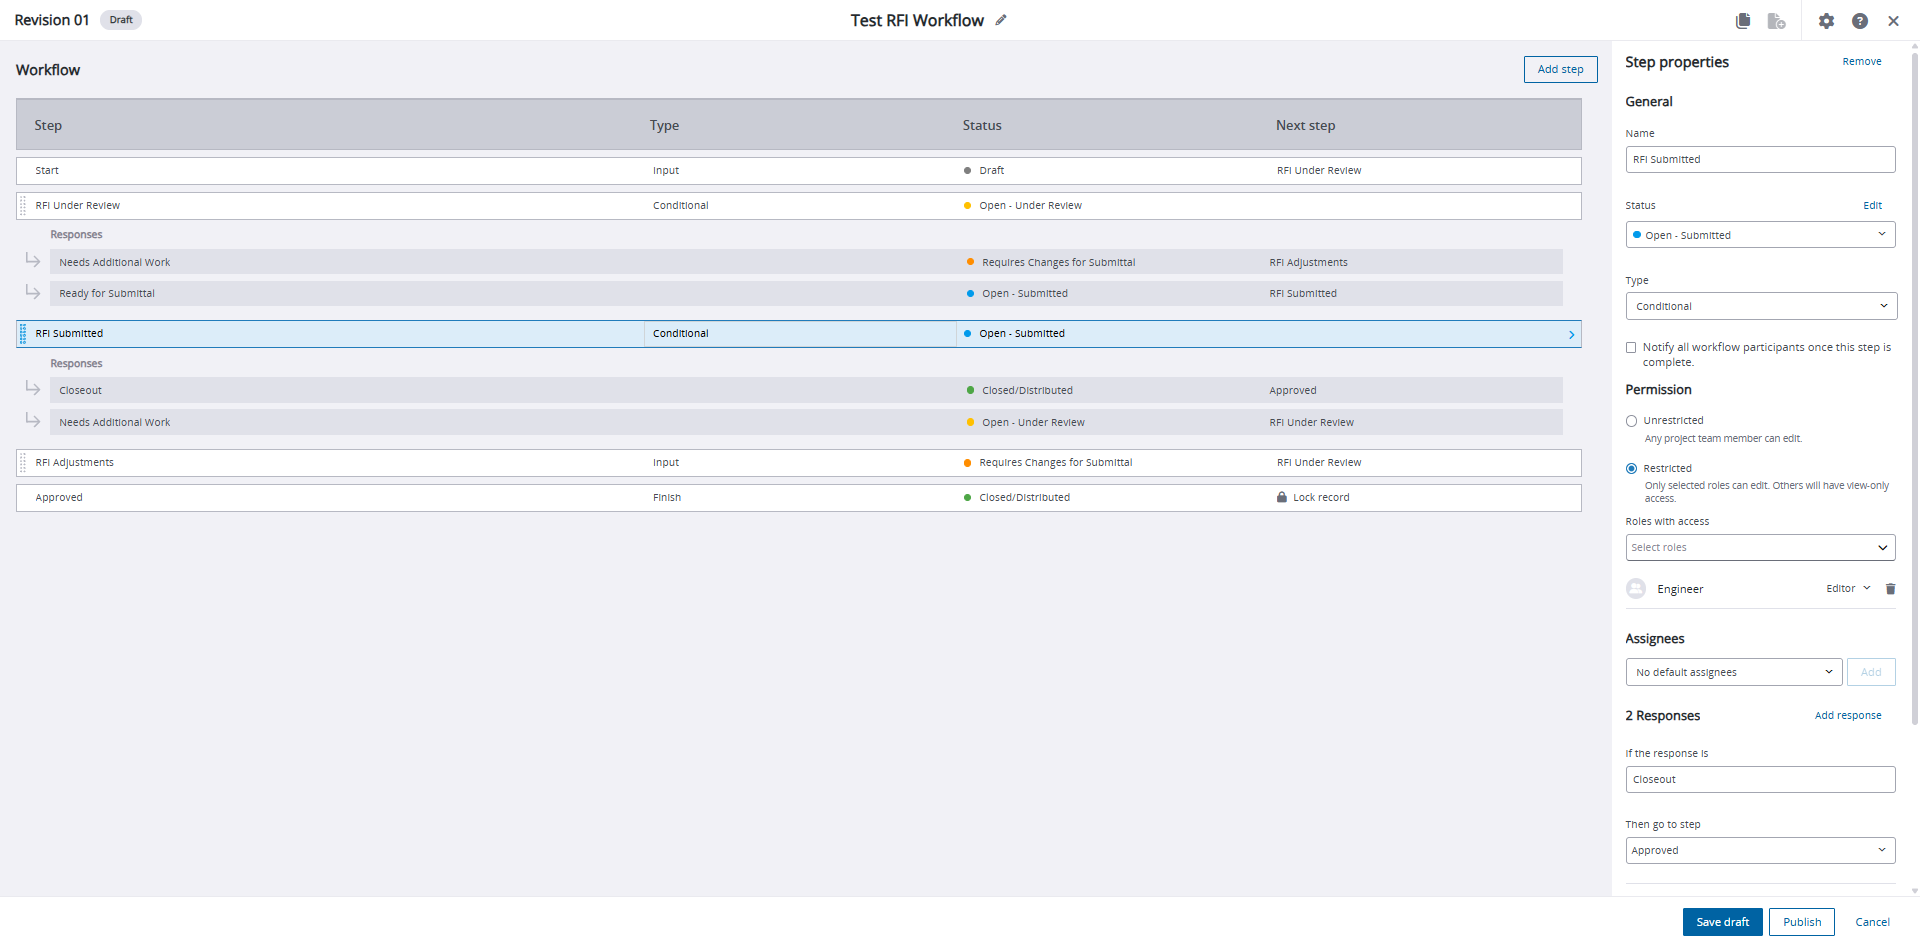
This status will closely mirror the “Open – Under Review” status: there is a restricted permission structure (though this time for engineers and not PMs or PEs), an option for default assignees and two conditional responses.
RFI Adjustments:
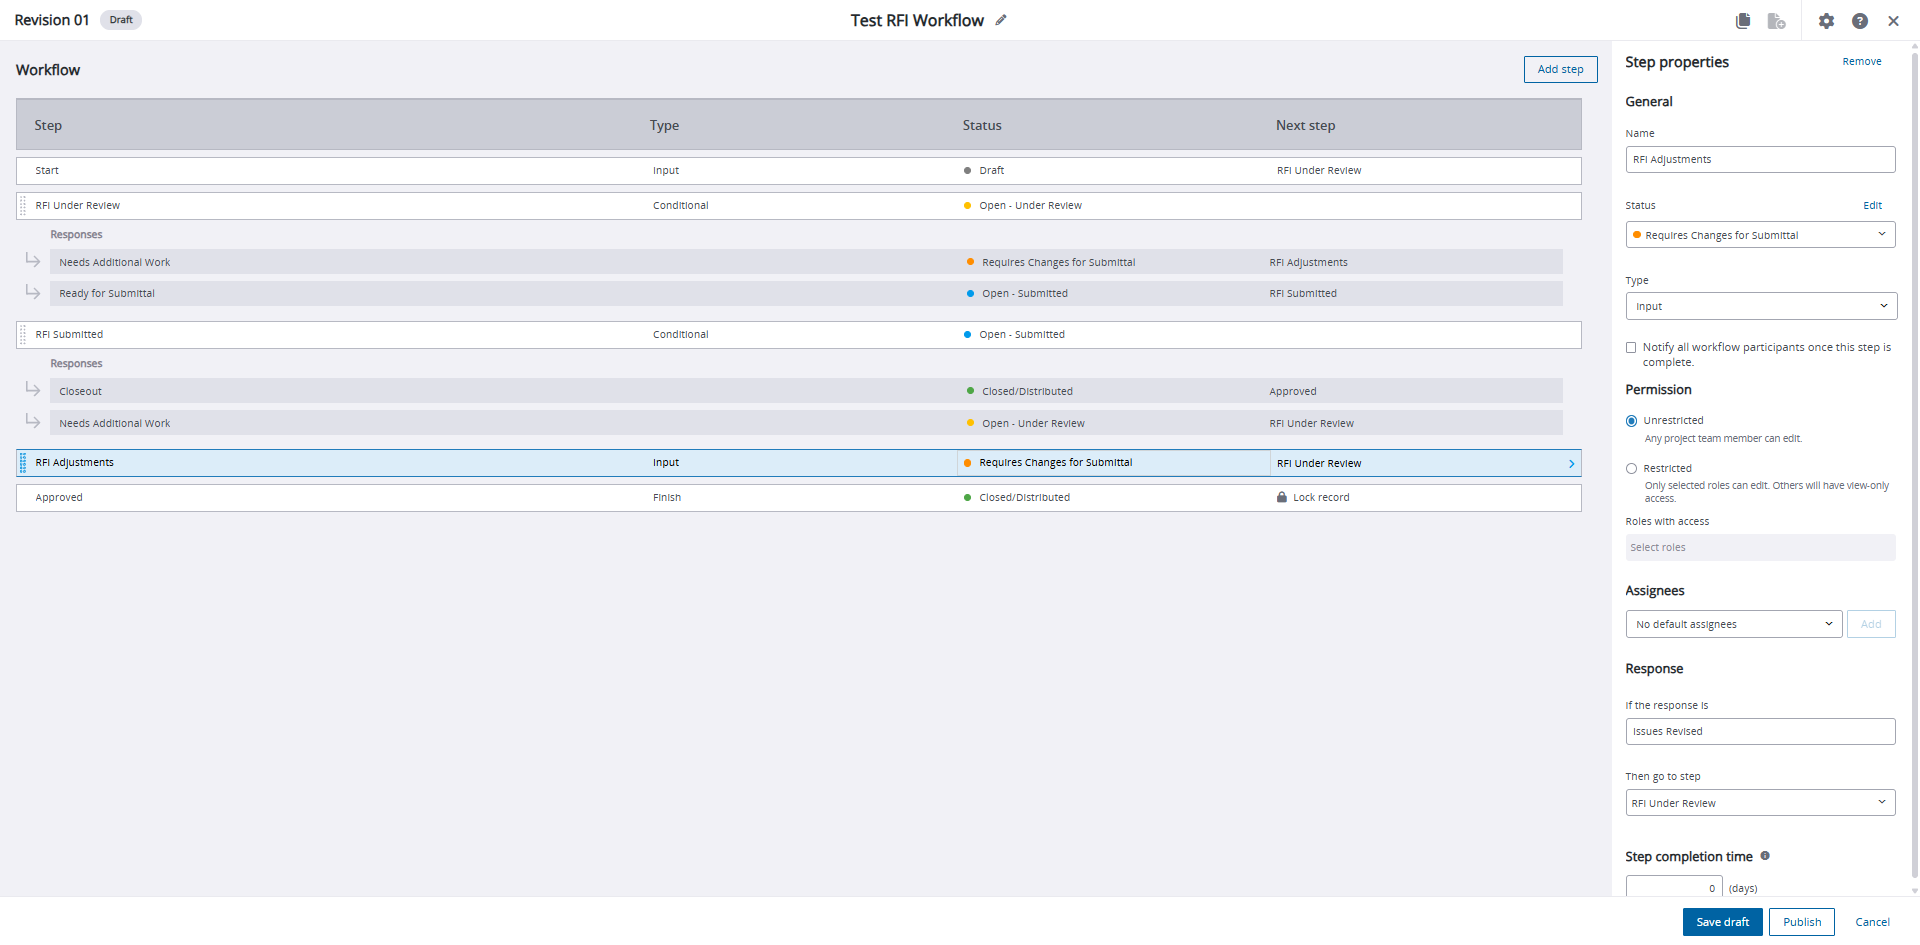
In this stage, identified issues with the RFI can be edited. Once those edits are complete, we have setup the workflow to send the record back to “Open – Under Review.”
Approved:
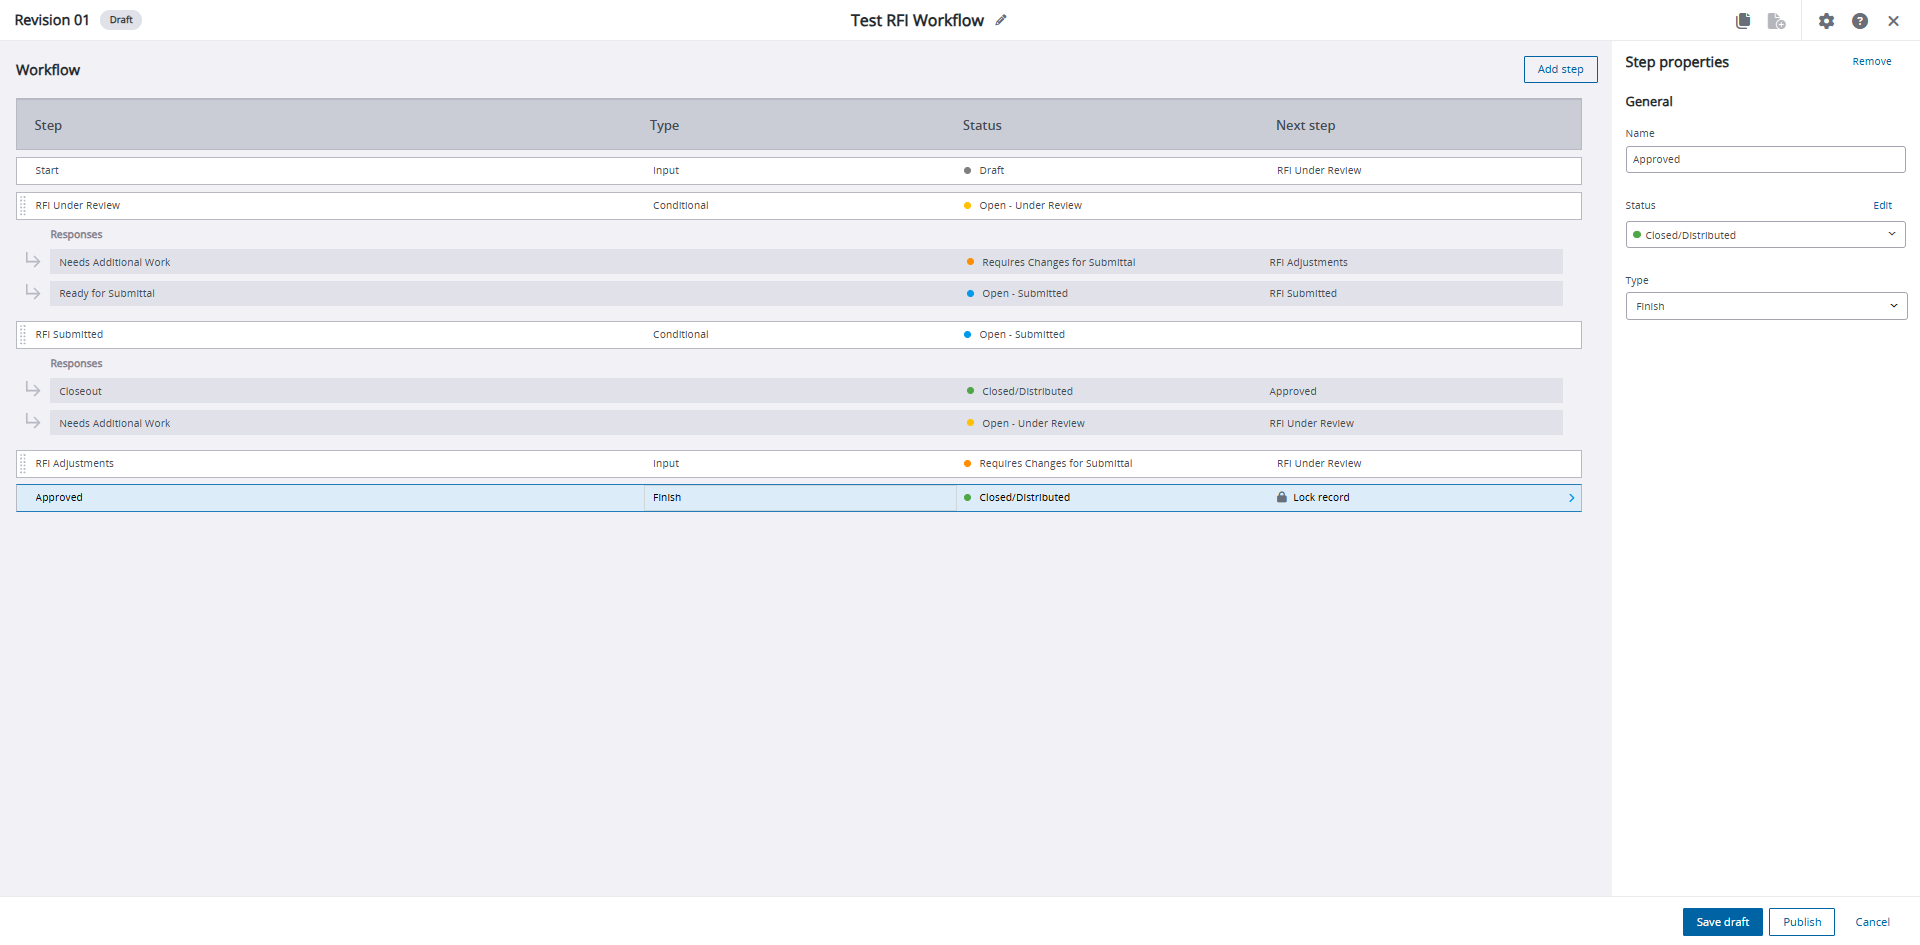
In our final stage, we simply mark the “Type” as “Complete” and this closes out the workflow process.
The “ball-in-court” workflows feature is one of ProjectSight’s most powerful new features. If you have any questions about how to leverage this new tool for your workflows, please visit our website – ConstrucTech Consulting – and Book a Call with one of our consultants.
We discussed ProjectSight’s new feature – “ball-in-court workflows” – in December, a few weeks after the product arrived to users. In this blog post today, we will dive deeper into workflows and how users can properly configure them for real world scenarios, specifically for Requests-for-Information (RFIs).
To begin creating a workflow for my RFIs, I will first need to enter my settings portal. You can build workflows in either portfolio or project settings, but I would recommend building them in project settings since each project can be unique in its required steps and personnel. In our project settings, we will navigate to Records>RFIs>Workflows. Like I discussed in the previous blog post, there will be a black bar at the top of your screen asking if you would like to “Upgrade now.” It is no additional cost but is a requirement to shift from regular workflows to ball-in-court workflows.
Once you select “Upgrade now” and create a new workflow, you will see a screen like the one below. I have already created an example workflow and will post screenshots of each step with detailed instructions on how to properly configure the step properties.
Draft:
Every workflow will begin with this “draft” status. There are minimal properties to tweak since it is a required status. For your type, make sure to select “Input” for records that simply need to progress from one status to the other or “Conditional” for records that require a binary response like “Approved” or “Unapproved”.
The “Permission” structure dictates who is going to be able to create a record with this workflow. Since we want anyone with the proper permissions to generate an RFI, we will leave out any permission restrictions. Upon creation, we want our record to advance to “Open – Under Review” so we will select that as our next step in the “Response” section.
Open – Under Review:
When an RFI reaches this status, we want the PM or PE to vet the RFI for accuracy and contract alignment. Since we only want one of those two security roles to push the RFI through this stage, we can assign those roles to this stage. That way, they are the only users – besides Portfolio Administrators – who can push this record along to the Submittal stage.
We can also add users to the Default Assignees list if we need any singular person to always be attached to a record when it hits this stage. Finally, we build in our two possible “Conditional” responses, one for sending the RFI to the next step and the other for bouncing it backwards to the RFI Adjustments stage. There is also an option to add the number of days the step should take to complete and the record’s due date will become the sum of all days in each row.
Open – Submitted:
This status will closely mirror the “Open – Under Review” status: there is a restricted permission structure (though this time for engineers and not PMs or PEs), an option for default assignees and two conditional responses.
RFI Adjustments:
In this stage, identified issues with the RFI can be edited. Once those edits are complete, we have setup the workflow to send the record back to “Open – Under Review.”
Approved:
In our final stage, we simply mark the “Type” as “Complete” and this closes out the workflow process.
The “ball-in-court” workflows feature is one of ProjectSight’s most powerful new features. If you have any questions about how to leverage this new tool for your workflows, please visit our website – ConstrucTech Consulting – and Book a Call with one of our consultants.


Get Started
Take your construction company to the next level. Schedule your initial free consultation and analysis.